Topic 5: Misc. Questions
A company uses Dynamics 365 Business Central.
You need to duplicate a company based on the existing Dynamics 365 Business Central company.
Which four actions should you perform in sequence? To answer, move the appropriate actions from the list of actions to the answer area and arrange them in the correct order.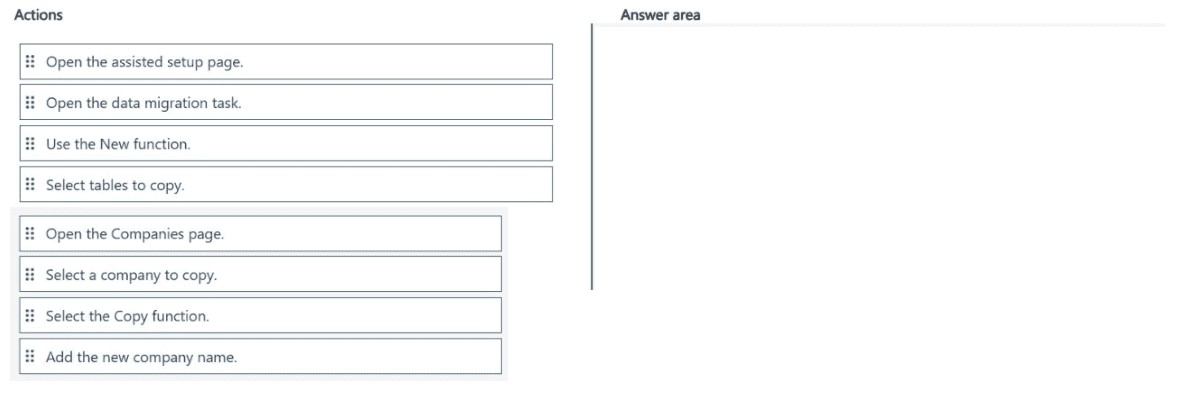
Explanation of the Sequence:
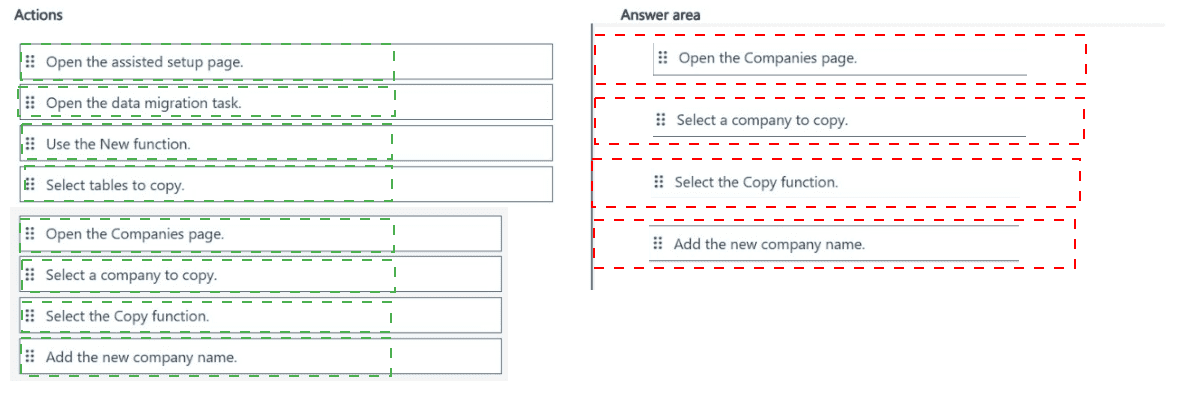
Step 1 – Open the Companies page:
Navigate to the Companies page (search "Companies"). This page lists all existing companies in the environment and provides actions for creating, copying, or deleting companies.
Step 2 – Select a company to copy:
From the list of companies, highlight or select the existing company that will serve as the source (template) for duplication. This tells the system which company's data and setup to copy.
Step 3 – Select the Copy function:
Click the Copy action from the ribbon or context menu. This initiates the company copy wizard, which will prompt for the new company name and ask whether to copy all data or only master data/setup.
Step 4 – Add the new company name:
Enter the unique name for the new company in the dialog box. Optionally, you can specify whether to copy all data or only structure/setup. Confirm to complete the duplication process.
Why Actions from the First List Are Not Used:
Open the assisted setup page: Assisted setup is for initial configuration, not for duplicating a company.
Open the data migration task: Data migration is for importing data from external sources, not copying an existing company.
Use the New function: Creates a blank new company, not a duplicate of an existing one.
Select tables to copy: This is part of configuration migration or data export, not the standard company copy wizard.
Reference:
Microsoft Learn – "Create New Companies" – Copying an existing company in Business Central
You ate configuring Dynamics 365 Business Central security settings.
You assign the following permission sets to a user:
You need to determine how the system handles the user's permissions.
What is the outcome of the user permission configuration?
A. The permission set order will allow a user to create a new customer
B. The Blank option will allow a user to create a new customer.
C. The Yes option will allow a user to create a new customer.
Explanation:
The user has two permission sets assigned: CustomerMgmt (with Insert = Yes on Customer table data) and ReceivablesMgmt (with Insert = Blank on the same table). In Business Central, when multiple permission sets apply to the same object, the most permissive value wins. Yes overrides Blank. Therefore, the user can create new customers.
Correct Option (C. The Yes option will allow a user to create a new customer):
The CustomerMgmt permission set explicitly grants Insert = Yes on the Customer table (ID 18). This permission allows the user to create (insert) new customer records. Because Yes is a positive grant and Blank means no explicit permission (implicitly deny unless granted elsewhere), the Yes from CustomerMgmt takes precedence and enables customer creation.
Incorrect Options:
A. The permission set order will allow a user to create a new customer:
Permission set order (priority) does not override explicit permissions. The system combines permissions; order only matters for field-level conflicts, not for table data Insert where Yes > Blank.
B. The Blank option will allow a user to create a new customer:
Blank means no explicit permission is assigned. It does not grant Insert rights. Without another permission set providing Yes or Indirect, Blank results in no access.
Reference:
Microsoft Learn – "How Permission Sets Combine" – When multiple permission sets apply to the same object, the most permissive value (Yes > Indirect > Blank) is used.
A heavy equipment dealership with two warehouses is implementing Business Central.
One warehouse is for parts, and one is for equipment. The dealership must separate inventory by the type of item and post to two general ledger (G/L) accounts:
• Parts Inventory
• Equipment Inventory
You need to configure the system to post inventory to the correct G/L accounts.
Which components should you use? To answer, move the appropriate components to the correct configurations. You may use each component once, more than once, or not at all.
You may need to move the split bar between panes or scroll to view content.
NOTE: Each correct selection is worth one point.

Configuration 1: Select inventory accounts for G/L posting
Correct Component: Inventory Posting Setup
Explanation: The Inventory Posting Setup page (formerly Posting Group Setup) is where you define specific G/L accounts for inventory posting, including Inventory Account, Interim Account, Cost of Goods Sold (COGS) Account, and Variance Account. This page links inventory posting groups to G/L accounts.
Incorrect Components:
General Posting Setup: Defines G/L accounts for general sales and purchase posting (e.g., Sales Account, Purchase Account), not specifically inventory accounts.
Location: Defines warehouse-specific settings but does not map inventory to G/L accounts.
Item: Holds inventory posting group assignments but does not select the G/L accounts themselves.
Reference: Microsoft Learn – "Inventory Posting Setup" – Define G/L accounts for inventory
Configuration 2: Combine with an inventory posting group to determine which G/L account to use during posting
Correct Component: Item
Explanation: Each Item card contains the Inventory Posting Group field. When you assign an inventory posting group to an item, Business Central combines that group with the Inventory Posting Setup (and optionally location) to determine the correct G/L account (e.g., Parts Inventory vs. Equipment Inventory) during posting.
Incorrect Components:
General Posting Setup: Used for customer/vendor posting, not item-level inventory group assignment.
Location: Can be used with posting groups but is not the component that "combines with an inventory posting group" directly.
Inventory Posting Setup: Defines the accounts but does not itself carry the inventory posting group assignment per item.
Reference: Microsoft Learn – "Item Card – Inventory Posting Group Field"
A company uses Dynamics 365 Business Central.
The company has the following purchasing requirements:
• Ensure that the costs on credit memos match the costs from the originating invoices.
• Process the shipment document of a return at the same time the credit memo is posted.
You need to set up purchase and payables.
Which settings should you configure? To answer, select the appropriate options in the answer area.
NOTE: Each correct selection is worth one point.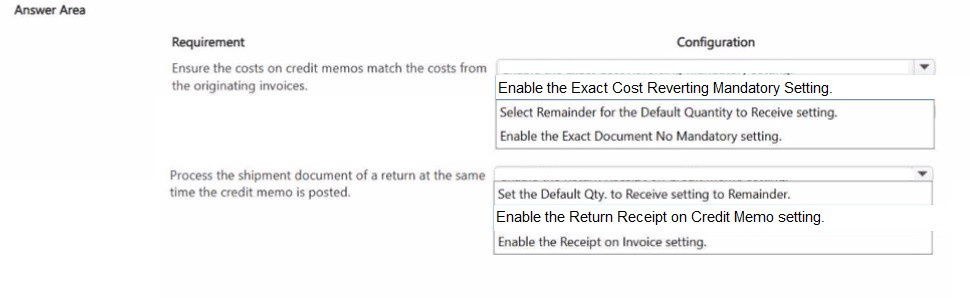
Requirement 1: Ensure costs on credit memos match costs from originating invoices
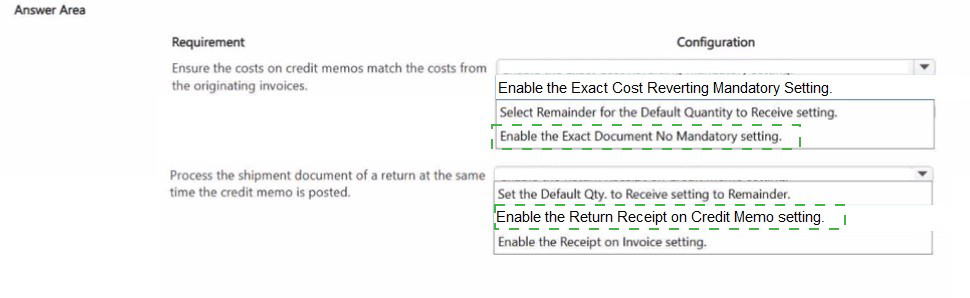
Correct Setting: Enable the Exact Cost Reverting Mandatory Setting
Explanation: When this setting is enabled, Business Central requires that return orders (credit memos) revert the exact original cost from the originating invoice rather than using the current average or standard cost. This ensures cost matching for accounting accuracy, especially when inventory valuation changes over time.
Incorrect Options for this requirement:
Select Remainder for the Default Quantity to Receive setting: Controls default receive quantity on returns, not cost matching.
Enable the Exact Document No Mandatory setting: Forces document number referencing but does not guarantee cost matching.
Set the Default Qty. to Receive setting to Remainder: Same as above – quantity, not cost.
Enable the Receipt on Invoice setting: Unrelated to credit memo cost reverting.
Reference: Microsoft Learn – "Exact Cost Reverting" in Purchases & Payables Setup
Requirement 2: Process shipment document of a return at the same time the credit memo is posted
Correct Setting: Enable the Return Receipt on Credit Memo setting
Explanation: This setting allows the system to post the return shipment (receipt of returned goods) automatically when the credit memo is posted. Instead of processing return receipt and credit memo as separate steps, they happen together, streamlining the return process and ensuring warehouse and financial documents are synchronized.
Incorrect Options for this requirement:
Enable the Receipt on Invoice setting: Controls receiving for regular purchase invoices, not for returns/credit memos.
Select Remainder / Default Qty. to Receive: Only affects default quantity values, not simultaneous posting.
Enable the Exact Cost Reverting Mandatory Setting: Cost-related, not document posting synchronization.
Reference: Microsoft Learn – "Return Receipt on Credit Memo" in Purchases & Payables Setup
You set up a new company in Dynamics 365 Business Central.
You need to demonstrate Page Inspection functionality.
Which features should you use? To answer, drag the appropriate page inspection features to the correct display requirements. Each page inspection feature may be used once, more than once, or not at all. You may need to drag the split bar between panes or scroll to view content.
NOTE: Each correct selection is worth one point.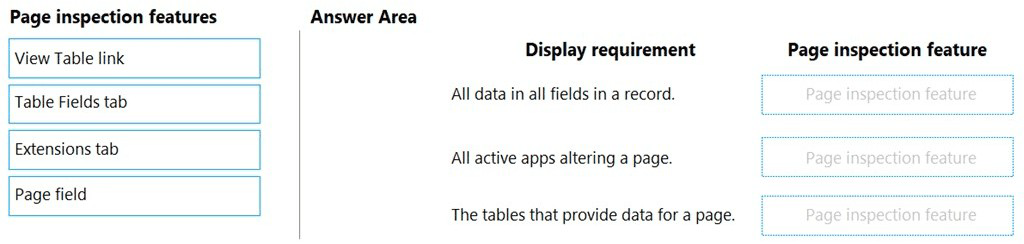
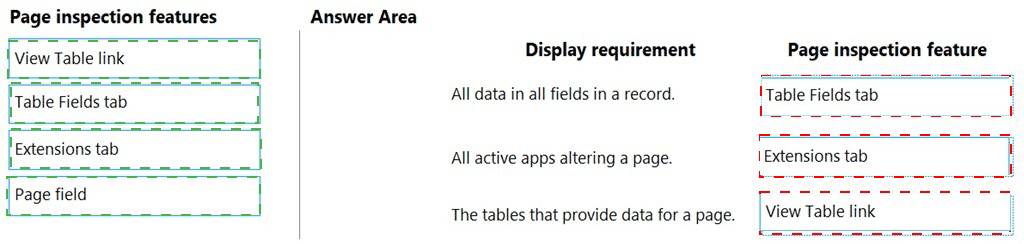
Requirement 1: All data in all fields in a record
Correct Feature: Table Fields tab
Explanation: The Table Fields tab within Page Inspection displays all fields from the underlying table(s) for the current record, including field values, data types, and whether they are editable. This shows all data in the record, not just fields visible on the page.
Incorrect Features:
View Table link: Opens the underlying table but does not show all fields inline within the inspection window.
Extensions tab: Shows installed extensions that modify the page, not field-level data.
Page field: Displays page metadata (name, ID, source table), not record data.
Reference: Microsoft Learn – "Page Inspection" – Table Fields Tab
Requirement 2: All active apps altering a page
Correct Feature: Extensions tab
Explanation: The Extensions tab lists all extensions (apps) that are actively modifying or extending the current page. This includes both Microsoft and third-party extensions, showing which apps contribute to the page's behavior and UI.
Incorrect Features:
View Table link: Only links to the source table, not to extension information.
Table Fields tab: Shows table fields only, not which extensions alter the page.
Page field: Displays page identity, not extension details.
Reference: Microsoft Learn – "Page Inspection" – Extensions Tab
Requirement 3: The tables that provide data for a page
Correct Feature: View Table link (or Page field in some versions, but standard is View Table)
Explanation: The View Table link at the top of the Page Inspection window opens the underlying source table(s) for the page. The Page field shows the primary source table name and ID. In many exam contexts, the View Table action is used to see which tables provide data (including related tables).
Note: If the answer area requires a single match and "Page field" is available, that also shows the source table. However, "View Table link" is the action that directly navigates to the table(s) providing data. Based on typical MB-800 exam answers, View Table link is preferred for this requirement.
Incorrect Features:
Table Fields tab: Shows fields from the table but does not list which tables are involved.
Extensions tab: Unrelated to table identification.
Reference: Microsoft Learn – "Page Inspection" – View Table Action
A company uses Business Central.
A user mistakenly partly applied two cash receipts to a posted sales transaction.
You need to remove the first cash receipt from the posted sales transaction to correct the mistake.
Which four actions should you perform in sequence? To answer, move the appropriate actions from the list of actions to the answer area and arrange them in the correct order.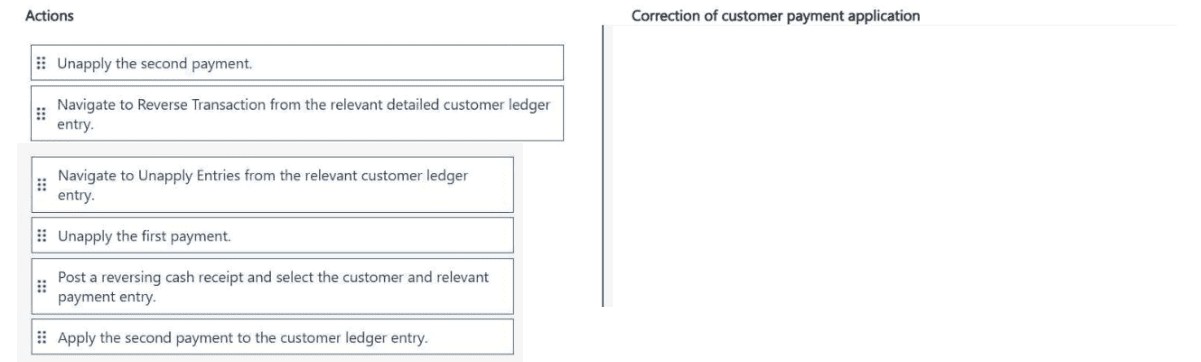
Explanation of the Sequence:
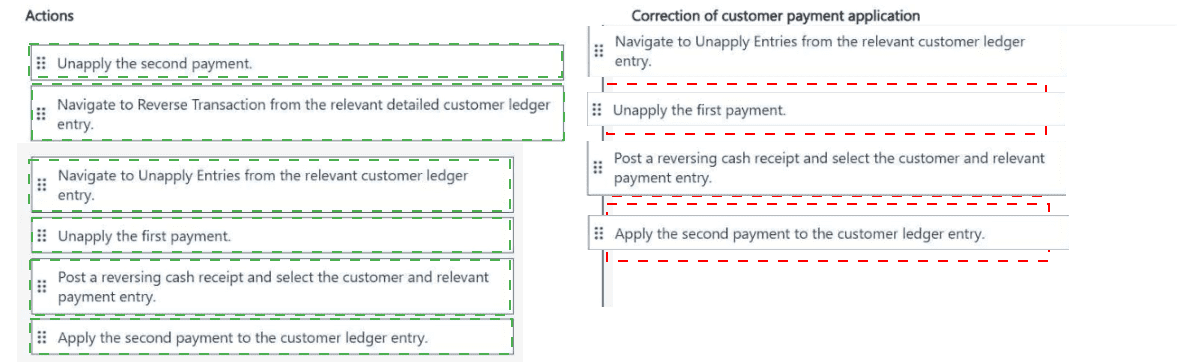
Step 1 – Unapply the second payment:
You must first unapply the most recent (second) payment from the sales transaction. Applications must be removed in reverse chronological order because Business Central maintains application entries as a linked chain. Unapplying the second payment breaks the last link.
Step 2 – Unapply the first payment:
After the second payment is unapplied, you can now unapply the first payment (the one you want to remove). This completely reverses the application of the first cash receipt from the sales invoice.
Step 3 – Apply the second payment to the customer ledger entry:
Reapply the second payment to the same sales invoice (or the relevant customer ledger entry). This restores the correct partial application for the second payment without including the first payment.
Step 4 – Navigate to Reverse Transaction from the relevant detailed customer ledger entry:
Go to the Detailed Customer Ledger Entry for the first cash receipt and select Reverse Transaction. This creates a reversing entry for the first payment, effectively removing it from the system or marking it as corrected, depending on the posting setup.
Alternative interpretation: If the goal is simply to remove the first payment's application without reapplying the second, Steps 1–2 may suffice, but the question implies a correction where the second payment should remain applied. Step 4 ensures the first payment is fully reversed.
Why Other Actions Are Incorrect or Out of Sequence:
Navigate to Unapply Entries from the relevant customer ledger entry: This is a valid action, but the sequence above uses the more precise Unapply action directly. The key is the order—second payment first.
Post a reversing cash receipt and select the customer and relevant payment entry: This is an alternative method but not part of the standard four-action sequence for unapplying and reapplying.
Apply the second payment before unapplying both: Incorrect order—you cannot reapply without first unapplying.
Reference:
Microsoft Learn – "Unapply Customer Ledger Entries" and "Reverse Transactions" in Dynamics 365 Business Central documentation.
| Page 3 out of 24 Pages |